Wednesday, May 5, 2010
Control Weeds Birch Bed Part 2
4-05-10
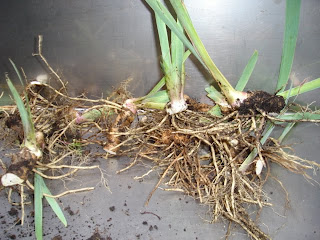
Today our cert 2 and 3 groups revisited the Birch Bed again. The aim was to remove as many weeds as we could. Then we would re-plant some Acanthus mollis and Iris that were removed from the olive bed. The main weeds removed were rope twitch, sow thistle, black knightshade and tall mallow. The group again worked really hard and it was great to see the end result.
Control Weeds garden opposite Birch Bed
27-4-10
Today our group tackled the garden bed along the shed wall (opposite the Birch Bed). The aim was to remove the weeds, remove and divide the Iris then replant it back into the bed, remulch the entire bed. This was a fairly straight forward exercise. Most of the weed was our friend the rope twitch. The Iris was divided in the prop house and placed into 5 inch pots. The rest of the Iris (approx 20 or so) were put back in the garden bed. Approx 50mm of composted mulch was placed back onto the bed. The Iris was replanted approx 50cm apart.
Thursday, April 22, 2010
CONTROL WEEDS BIRCH BED
10-3-10
I have choosen the Birch Bed as the area for my Control Weeds assessment. The Birch Bed is quite a large area of approximately 200sqm. It is full of many different types of weeds which include:
Fumitory, Blackberry, Tall Mallow, Buckshorne plantain, Dandeloin, Cats ear, Sow thistle, Sorrel, White clover, Rope twitch, Petty spurge, Cleavers, Wireweed, Shepherds purse and Black nightshade. By far the most invasive weed is the Rope twitch.
Last year the Cert 2 group weeded out approx half of the top end of the Birch Bed. This was done manually with no sprays. Cardboard and mulch was also used to further reduce later infestation. It was intersesting to see that nearly a year later the Rope twitch was as bad as ever but the large area of Black nightshade was mostly gone.
This year weed removal has begun from the top northern end and the plan was to work down to the Southern end. Approx 30sqm at the top end was all Rope twitch. A huge network of under ground rizomes meant this weed was virtually impossible to erradicate completely. The twitch was removed by gently sifting through the soil with a garden fork. This would bring the rizomes to the surface.
22-4-10
Approx 5 weeks later I returned to the area where the Rope twitch was removed. Very little has grown back in that time. I manually pulled out by hand any new Rope twitch. This was very easy and there was no need to use the pitch fork.
Wednesday, March 31, 2010
Propagation
As part of our propagation and cost a project assesment Glyn from CLM has asked us to propagate native seeds for his CLM class. He asked for a certain number of seedlings per plant. A formula was worked out on how many seeds we would need by weighing them out.
The seeds we have so far propagated have been:
Acacia verticillata, Allocasurina verticillata, Bursaria spinosa, Eucalyptus moraea, Eucalyptus globulus, Eucalyptus ovata, Eucalyptus pulchella, Eucalyptus risdonii, Ficinia nodosa, Gahnia filum, Gahnia grandis, indigofera australis, Juncus pallidus, Lamandra, logifolia, Poa labillardierei, Poa rodwayii, Themeda triandra.
The seeds were placed in cells, punnets or forrestry tubes and a native prop mix was used. Also on the list was Dianella revoluta and Dianella tasmaniaca. These can take a very long time to germinate, so it was decided to do these by division. We pulled out some clumps that were on the school gounds and divided them. They were root prunned and the leaves cut right down to the base. They were then placed into forrestry tubes in a native mix.
Vege Plot
Feb 2010:
As one of our main projects for this year, the cert 2 and 3 groups had to put in a vegetable garden. Each student was given an area 4.2mt x 1.2. The areas were marked out with string lines after the plots were measured out with a tape measure. The type of soil we were dealing with was a damp, thick, clay based soil. To make matters worse Mike had the irrigation on the day before we started. The soil was turned and big clay clods were broken down with a pitch fork and spade. Next around 2-3 wheel barrows of compost was added and gently worked into the soil. At the same time, chicken pellets and gypsum was also added and mixed through. It was important when turning the soil not to go too deep and bring up large clods of damp clay. The garden bed was raised up around 20cm from ground level.
We also had to put in mulch on the paths that went around the beds. This was done with by first placing damp sheets of newspaper down and then wood chips. The mulch would stop people from walking on a muddy path. It would also act as weed suppresent.
The garden bed was now ready for planting. It was vital to choose seeds that could be planted for this time of the year so they would germinate. We went through a list and wrote down all the seeds we could plant. We then put several different seeds into a prop mix in punnets, and tray cells. These included broccoli, parsley, lettuce, cabbage, beetroot, radish. Once the seedlings came up we would then plant some of these. We also directly sowed several different seeds.
The seeds I dirrectly planted in my vege plot were, baby carrott, lettuce, sugar snap, corriander,
a punnet of established broccoli. After about 2 weeks some of the seedling from the nursery were ready to plant. I planted beetroot and radish.
It is important to implement a weed control program for your vege plot. Trying to keep your plot as weed free as possible. So far I have hand pulled the weeds out, which have been mainly grass. I will also introduce a pest and disease program as the plants get established.
Tuesday, March 30, 2010
Cert 2 and Cert 3 Garden Area
Feb 2010:
One of our major tasks for this year was to implement a garden maintance program. This would look at pruning, weeding (weeds), mulching, pest and diseases and possibly irrigation.
The cert 2 and cert 3 classes have joined together for this project to then split into 3 groups. Each group has been assigned a designated area to look after. The cert 3s were John F, Merve and myself, also we had Darren, David, Allen and Josh from Cert 2. I think our group got lucky because everyone in the group seemed hardworking and motivated. Our assigned area was the Birch Bed, along the mesh fence on the carpark side, the bed in front of the work shed on the northern end, and also the Lonicera nitida hedge.
The first thing our group looked at doing was to trim back the Lonicera nitida (honey box suckle)
hedge. This hedge had been poorly maintained over the last few years and was in desperate need of a trim. Roy showed us what he wanted doing and we set to work. It was interesting to note that hedge trimming is a little trickerier thean it looks. We used a string line line to get a straight edge. Hedging shears and secatuers were used.
The next time our group got together we tackled the mesh fence where the car park is. There were established plants such as the Wisteria, Hardenbergia and roses which were all in need of some desperate pruning. I was noticed that on the roses were powdery mildew and aphids. I must say I was impressed with the way the cert 2 guys got stuck into it. They were really confidient and worked hard all day. Everything was pruned back with secataers and by the time the job was done the fence line looked great. Wayne decided to put some wooden sleepers along to stop cars from getting too close to the fence.
Sunday, March 28, 2010
Propagation - Budding
FEB 2010:
Around the middle of Feb 2010 our Cert 3 group went on a trip to Red Knights Fruit Farm. The Farm is a large Orchard which grows many types of fruit trees. Nathan Morrison was there to show us some budding techniques on Peach trees. There are two types of budding proceedures which work really well on Peach trees.
The two types are called T Budding and Chip Budding. The fastest and easiest one is chip budding. We did not do any T budding.
Chip Budding: This process involves 2 cuts both on the stock plant and the other on the scion. The first cut is made at a downward angle of 45 to 60 degrees and a depth of around 2mm. The second cut is made about 3/4 higher and then down to meet the first the cut. The chip created where the bud is on the scion wood is then removed and placed into the root stock cut. It is important that both chips are a similar size so they match up properly. The final step is to wrap the new bud to the the root stock with grafting tape.
There are many different fruit trees as well as roses that use chip and T Budding.
Please also not that the root stock that was used were suckers that had come up from Peach trees that had been chopped down to a stump. It was important to use the same type of rootstock and scion wood.
A week later we again did Chip budding with Nathan in our school nursery. This time we also did T Budding.
The rose rootstocks were cut into 100mm lengths and around a pencil thick. The bottom nodes were removed to prevent further suckering. Once this was done we then did the Chip Budding.
T-Budding: A T cut is made on the rootstock. A downward cut of around 3-4cm and a top slit (to form a T) of around 1-2cm. Going in around 2mm until the cambion layer is exposed. A bud is then removed from the scion wood. Cut out the bud 2cmm below and 1cm above, making a shallow cut. Then insert the bud into the T cut and wrap with grafting taped.
Once the new buds were on the root stock both ends of the rootstock were dipped in hormone gel. These were placed in forestry tubes that were filled with prop mix.
Scion wood- Rosa Iceberg
Rootstock- Rosa floribunda
Tools and equipment:
Secatuers
Grafting tape
Budding knife
Hormone Gel
Prop mix
Subscribe to:
Posts (Atom)